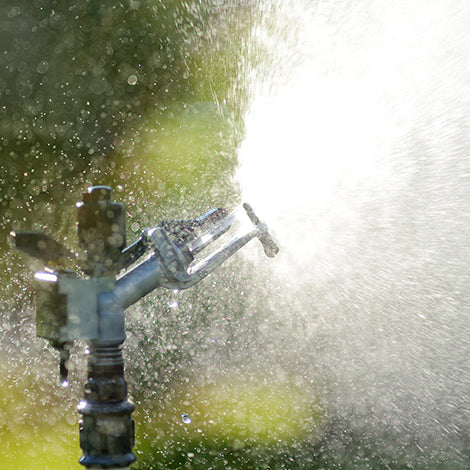


How to Winterize Garden Hoses and Watering Accessories Before the First Freeze
When fall temperatures begin to drop, gardeners usually focus on plants, leaves, and outdoor furniture. But one of the most important winterization jobs is easy to overlook: preparing your garden hose and outdoor watering equipment.
A hose left connected to an outdoor faucet can hold water near the faucet and inside the hose. When that water freezes and expands, it can damage the hose, fittings, faucet, or the plumbing behind the wall.
For removable garden hoses and watering accessories, winter preparation is usually a manageable homeowner task. Allow extra time for drainage, drying, and any necessary repairs.
Why You Should Disconnect Your Garden Hose Before Freezing Weather
Water expands when it freezes. Any water trapped inside a hose, nozzle, splitter, timer, or faucet connection can place pressure on the surrounding parts.
Leaving a hose attached may also prevent some outdoor faucets from draining as designed. Even a faucet labeled “frost-free” depends on correct installation, drainage, and the removal of attached accessories.
Finish winter preparation before the first local forecast of freezing temperatures—32°F (0°C) or below—not after ice forms. Monitor your local forecast rather than relying on a fixed calendar date or waiting for a hard-freeze warning. Freezing risk also depends on exposure, insulation, and how long temperatures stay low; a brief reading of 32°F does not mean every pipe freezes immediately. See the National Weather Service’s freeze terminology.
What You Will Need
Most homeowners will only need a few simple items:
- Work gloves
- A clean cloth
- A bucket
- A hose hanger or storage reel
- A dry, protected place for the hose, plus frost-free indoor storage for timers and freeze-sensitive accessories
If a hose connection is badly corroded, stuck, or causes the faucet to move when turned, stop and contact a qualified plumber. Applying too much force can damage the pipe connection inside the wall.
Step 1: Disconnect the Hose and Seasonal Accessories

Before disconnecting anything, take a photo of the accessory connections for reference next spring. Close the faucet, then remove the garden hose before freezing weather arrives.
Follow the manufacturer’s instructions to remove detachable seasonal accessories connected to the faucet or hose, such as:
- Y-splitters
- Watering timers
- Spray nozzles
- Quick-connect fittings
- Filters
- Pressure regulators
- Removable hose-end backflow devices only where the manufacturer specifically instructs seasonal removal
Do not leave a seasonal timer or splitter attached simply because the hose has been removed. These accessories can retain water that may freeze and crack the housing or fittings. Do not remove permanent plumbing or built-in backflow protection. If you cannot identify a device or its winterization procedure, ask a qualified professional.
Step 2: Drain the Garden Hose Completely

For a fully disconnected, removable garden hose, remove any nozzle or closed-end attachment before draining. This gravity-drain method is not a procedure for clearing buried irrigation pipes.
Lay the hose out as straight as possible. Starting at one end, lift the hose section by section so gravity pushes the remaining water toward the open end.
Pay special attention to low spots where water may collect.
For a long hose, placing the middle section over a railing or another elevated surface can help the water drain more completely.
Do not assume that an empty-looking hose is completely dry. Water can remain trapped in coils, bends, and fittings.
Step 3: Drain Timers, Splitters, and Nozzles

Turn each accessory so any remaining water can escape.
If the product has a removable battery, filter, cap, or drain plug, follow its winter storage instructions. Remove batteries from seasonal hose-end timers when the manufacturer directs it. This does not mean disconnecting or removing a fixed irrigation controller.
Rigid plastic components deserve extra attention because trapped water can expand and crack the housing during a freeze.
Once drained, wipe the components clean and allow them to dry. Store hose-end timers and other freeze-sensitive accessories in a dry, frost-free indoor location. An unheated garage or shed can still drop below freezing. Orbit’s hose-timer guidance calls for draining the timer and storing it in a warm, dry place before freezing weather.
Step 4: Inspect the Hose and Fittings

Fall is a good time to identify damage that could become a leak next spring.
Check the full length of the hose for:
- Cracks or splitting
- Soft or swollen areas
- Severe kinks
- Abrasion
- Damaged threads
- Corroded metal connectors
- Missing or flattened rubber washers
Replace damaged washers and mark any hose that needs repair or replacement. This prevents a surprise leak when the watering season begins again.

Step 5: Coil and Store the Hose Properly

Coil the drained hose loosely without sharp bends or tight kinks.
Choose a dry, sheltered location that meets the hose manufacturer’s storage instructions. A garage, basement, or shed may be suitable for the drained hose, but an unheated building is not automatically suitable for timers or freeze-sensitive accessories. Keep the hose out of direct sunlight and avoid repeated freeze-thaw exposure where possible.
If indoor hose storage is unavailable and the manufacturer permits outdoor storage, drain the hose completely and protect it from standing water, snow buildup, and equipment damage. Label dry fittings and keep small parts together in the appropriate indoor storage area. Note any repairs or replacements needed for spring.
Step 6: Inspect the Outdoor Faucet

With the hose and removable seasonal accessories disconnected, take a minute to inspect the faucet itself.
Look for:
- Persistent dripping after the faucet is closed
- Cracks in the faucet body
- Corrosion around the threads
- A loose or moving wall connection
- Gaps where cold air can enter around the pipe
- Water stains or moisture near the exterior wall
A faucet that continues to drip may need repair before freezing weather arrives. A loose faucet or unexplained moisture near the wall should be inspected by a qualified plumber.
For a broader home inspection, use our complete outdoor faucet winter checklist.
Step 7: Choose the Correct Winter Protection Method
Identify the faucet before choosing a method. A conventional hose bib and a frost-free, self-draining faucet do not work the same way. Check the model instructions or ask a plumber to identify it. Not having a separate indoor shutoff does not automatically mean you need an add-on valve. These checks concern the outdoor faucet and its supply line—not an entire in-ground irrigation system.

Conventional Faucets: Shut Off and Drain Where Designed
Some homes have a dedicated indoor shutoff and drain arrangement for the outdoor faucet. If the line was designed for seasonal shutdown, follow its procedure for closing the indoor supply and draining the outdoor section. Leave the exterior faucet in the position specified for that system.
If you cannot identify the correct shutoff or drain arrangement, consult a plumber. Do not experiment with unrelated household shutoffs or assume that closing the outdoor handle alone empties the supply pipe.
Frost-Free Faucets: Preserve the Self-Draining Function
A standard frost-free faucet closes the water supply inside the heated part of the home and drains its exterior tube when shut off. This depends on correct downward installation pitch, an unobstructed outlet with the hose removed, and adequate heat around the indoor valve section. Follow your specific model’s instructions; “frost-free” is not a guarantee under every installation or weather condition.
Do not leave a hose or accessory attached if it prevents the faucet from draining as designed. Woodford’s standard frost-proof faucet guide explains these drainage requirements and notes that the standard design covered by that guide is not intended for continuous-use applications.
Add Appropriate Insulation and Weather Protection
For compatible conventional faucets, a properly fitted insulating cover can add protection. Insulate exposed or unheated-area piping as appropriate, and seal suitable gaps around pipe entry points without blocking required openings. These measures support—not replace—correct drainage and system-specific winterization. See Portland Water Bureau’s winter preparation guidance.
Check the device instructions before combining a cover or insulation with an automatic-discharge valve. Do not wrap or cover the device, or obstruct its outlet, drain, or vents, unless the manufacturer expressly allows that arrangement. Insulation alone does not guarantee protection through prolonged cold.
Lines That Must Remain Supplied: Check Compatibility First
If you need outdoor water during winter, ask which protection approach is suitable for your actual faucet and plumbing. Matching hose threads alone does not establish compatibility. Confirm both manufacturers’ requirements, including whether the faucet and accessory are suitable for the intended continuous-pressure or continuous-use arrangement.
A compatible temperature-activated freeze-protection valve may provide additional protection without electricity or batteries. Polar Valve’s operating instructions require the supply faucet to remain fully open during use and the outlet to point downward. This is a different operating condition from shutting off a standard self-draining faucet. Confirm compatibility before installation and follow the required supply and pressure conditions.
A faucet-mounted valve is not a replacement for winterizing a buried sprinkler system or a seasonally closed home, repairing damaged plumbing, or following local plumbing requirements. If the faucet and accessory instructions conflict or leave compatibility unclear, obtain manufacturer or qualified-plumber guidance before use.
When to Call a Winterization Professional
A removable hose and a buried sprinkler network are different systems. Some irrigation systems use manual or automatic drains; others require a compressed-air blowout, which pushes water out through the irrigation lines and sprinkler heads rather than sucking it out. Gravity drainage is appropriate only where the system was designed for it.
Compressed-air work requires the correct airflow, pressure limits, connection points, and procedures for each zone. Incorrect use can damage components or cause injury. This article is not a DIY blowout guide. Hunter and Rain Bird recommend professional help for irrigation winterization.
Contact a qualified irrigation specialist or plumber when:
- You have an in-ground sprinkler or permanent irrigation system and do not know its approved winterization method.
- The system needs compressed-air blowout, or includes fixed backflow assemblies, pumps, or flow sensors that require separate handling. Do not blow compressed air through backflow devices or pumps.
- A fitting is seized, the faucet moves at the wall, leaks persist, or the correct shutoff and drain arrangement is unclear.
- The home will be seasonally closed, unheated, or vacant for an extended period without reliable heat and monitoring. Arrange a plumbing-specific winterization plan; this is separate from storing a garden hose. See the Philadelphia Water Department’s guidance.
Ask the contractor which systems and components the service covers. A sprinkler blowout and a whole-home plumbing shutdown are not interchangeable services.
Short Trips Are Different from Seasonal Closure
For a short cold-weather trip while the home remains heated, the American Red Cross recommends leaving the heat on and setting it no lower than 55°F (about 13°C). This reduces risk but does not guarantee that vulnerable pipes will stay warm. A seasonally closed home, unreliable heat, or an extended absence calls for a separate plan with a qualified plumber; do not treat this hose checklist as whole-home shutdown instructions.
If Freezing Weather Has Already Arrived
Do not force a frozen faucet handle or use an open flame to thaw a pipe.
If you open a faucet and only a small trickle appears, the pipe may already be frozen. Check accessible plumbing areas and contact a licensed plumber if the frozen section cannot be safely located or reached.
If freezing or damage is suspected, locate the appropriate shutoff and arrange an assessment; leaks may appear as pipes thaw or water is turned back on. If you find a split pipe or active leak, shut off the water at the appropriate safely accessible valve and contact a plumber promptly. Do not simply wait and watch a confirmed leak. If you cannot safely reach or identify the shutoff, contact your property manager or water utility’s emergency service for help. See Portland Water Bureau’s frozen-pipe and leak guidance.
Your Fall Hose and Watering Accessory Checklist
Before the first local forecast of freezing temperatures:
- Disconnect every garden hose.
- Remove detachable seasonal accessories according to their instructions; leave permanent backflow protection in place.
- Drain hoses and accessories completely.
- Inspect hoses, washers, and threaded connections.
- Store the drained hose as its manufacturer directs; keep timers and freeze-sensitive accessories dry and frost-free indoors.
- Check the outdoor faucet for drips, cracks, or movement.
- Identify conventional versus frost-free faucet design, then confirm drainage, insulation, and any accessory compatibility.
- Arrange necessary leak repairs and professional irrigation winterization before cold weather arrives.
Make Spring Restart Easier
Keep your connection photos, labeled parts, and repair notes together. Before reconnecting equipment in spring, inspect the hose, washers, fittings, and faucet for winter damage. Follow the system’s start-up instructions, restore water gradually, and check for leaks while water is flowing—some freeze damage becomes visible only when the faucet is reopened. If a leak appears, stop use and arrange repair.
For installed drip irrigation, use the manufacturer’s specific restart procedure; Rain Bird’s seasonal drip-irrigation guide includes connection records, maintenance notes, and spring inspection reminders.
Prepare Now, Not During the First Freeze
Garden hose winterization is a small task, but it protects more than the hose itself. Removing connected equipment allows you to inspect the faucet, identify leaks, and prepare the outdoor water system before temperatures become dangerous.
Prepare removable equipment while the weather is still comfortable. Then confirm that the outdoor faucet has an appropriate protection plan, and arrange any professional work your plumbing or irrigation system requires before the first freeze.
Need outdoor water access during cold weather?
Learn more about Polar Valve’s temperature-activated outdoor faucet protection.
Cover photo: Mike Bird / Pexels. Stock photos are illustrative. Used under the Pexels License.
Visual guide: The seven step-by-step diagrams are AI-generated educational illustrations, not product installation photographs. Equipment varies; follow the instructions for your specific hose, accessories, and plumbing system.